
Manual Garden Seedling Transplanter
Manual Garden Seedling Transplanter
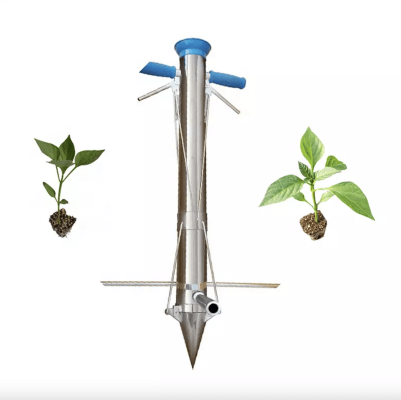
A manual garden seedling transplanter is a hand-held tool used to transplant seedlings or young plants from their original container to a larger one or to the garden soil. The tool typically consists of a handle and a hollow tube with a pointed end that is used to make a hole in the soil for the seedling. The seedling is then inserted into the hole and the soil is gently packed around it. This tool helps to minimize damage to the delicate roots of the seedling and ensures that it is planted at the correct depth. By using a manual seedling transplanter, you can efficiently and accurately plant seedlings, helping to ensure that they establish well and grow into healthy, mature plants.
Here is a step-by-step guide on how to use a manual garden seedling transplanter:
-
Prepare the soil: Make sure the soil in your garden bed or pot is moist and loose, and remove any weeds or debris.
-
Choose the right seedling: Pick a healthy seedling that has developed several leaves and a strong stem. Avoid seedlings that are leggy or have roots growing out of the bottom of the container.
-
Make a hole: Hold the transplanter with the pointed end facing down and push it into the soil to make a hole that is deep enough to accommodate the root ball of the seedling. The hole should be slightly wider than the root ball and just deep enough to allow the seedling to sit at the same depth as it was in its previous container.
-
Remove the seedling from its container: Gently squeeze the sides of the container to loosen the soil, and then gently pull the seedling out by its stem. If the roots are bound, use your fingers to gently loosen them so they can spread out in the new hole.
-
Place the seedling in the hole: Carefully insert the root ball of the seedling into the hole created by the transplanter, making sure that the seedling sits at the same depth as it was in its original container.
-
Fill the hole with soil: Use the soil from the garden bed or pot to fill the hole around the seedling, making sure to pack the soil firmly around the roots. Do not over-pack the soil, as this can damage the delicate roots.
-
Water the seedling: Water the seedling thoroughly, making sure that the soil around the root ball is evenly moist.
-
Label the seedling: If you have multiple seedlings, use a label to identify the type of plant and the date it was planted. This will help you keep track of the seedlings and ensure that they receive the proper care.
By following these steps, you can use a manual garden seedling transplanter to effectively transplant seedlings and help them establish well in their new environment.